To some it may seem to be the most trivial task of their makeup routine, others dread it to the point where they skip the step all together. However, if applied correctly lipstick can give you the most perfect pout you could possibly dream of, and even completely reshape your lips and add a little "pop" to your face! Paying special attention to my application method today, I've come up with some tips for those of you who are a bit lipstick challenged.
1. Exfoliate:
This is a step that can be skipped if you deem unnecessary, but every few days you should gently exfoliate the skin on your lips to give a smoother canvas. How do you go about doing this? Depends. I like to take a soft toothbrush designated solely for this purpose soaked in hot water for a moment, and then gently scrub back and forth on my lips. Other people like to use this method with a wash cloth as well.
2. Primer:
Always start with some sort of moisturizer under your lips before applying your desired lipstick, this provides a smooth base for application. I use chapstick, MAC Prep&Prime lip is also a popular choice for those willing to spend a little extra. Lipbalm, vaseline, etc. will also work fine.
3. Lip Liner:
You can also skip this step altogether if you choose, some people don't like the Chola-esque ring-around-the-lips look (myself included) however, if thats what you like feel free. In all honesty I don't have much experience applying actual colored lip liner, I use my previously reviewed clear lipliner from Benefit Cosmetics. For that, I apply it around the outer boarder of my lips, paying special attention to the shape. For example, my lips are very plump so I "curve" the bottom lip slightly to give it more of a pinched look. I wish I had an example picture for this, but I don't.
4. Yay, Lipstick:
Some people suggest applying lipstick with a brush rather than straight from the tube. To me this method seems a bit too tedious, however if you prefer as always, your welcome to do so. I find that just keeping the tip of your lipstick pointed helps to give more precise application. Start in the middle of the bottom lip with heavy pressure, and slowly start to lighten as you work your way out to the edges. Do not simply go straight across, you may need to move the stick from side to side as if you were painting. As you work your way to the outer corners, start to bring your lips in toward your mouth to help make the area smaller. Follow the same technique for your upper lip, except bring your lips out into a wider "fish face" when you start to head toward the outer corners. Once the "basic" application is in place, be sure to go over the corners of your mouth, people seem to forget this or the little amounts that were applied are accidentally wiped off. After you make sure you have the right shape and such, if you have big lips like me stick them out a bit and get the inner wet area of your lips. This can be difficult since it doesn't stick well to moist areas, but if you apply it as if you would eyeliner on your waterline (persistently) it should stick. If you skip this step, after a while it can look as if you only have lipstick around the outer area of your lips and not in the middle (yikes!). Also, be sure to define the cupid's bow!
Hope this helped, if you have any questions feel free to comment.
Tuesday, July 29, 2008
Thursday, July 24, 2008
I'm on YouTube!
Yep, I gave in and decided to start making video tutorials instead of waiting until I have enough to buy a video camera. (I already have to save up for an Xbox 360, and NOW a video camera?!) They're not the best quality, but it should satiate my urge to teach people makeups for now.
The channel can be found here
And here are the two videos I did. :)
The channel can be found here
And here are the two videos I did. :)
Thursday, July 17, 2008
Collection
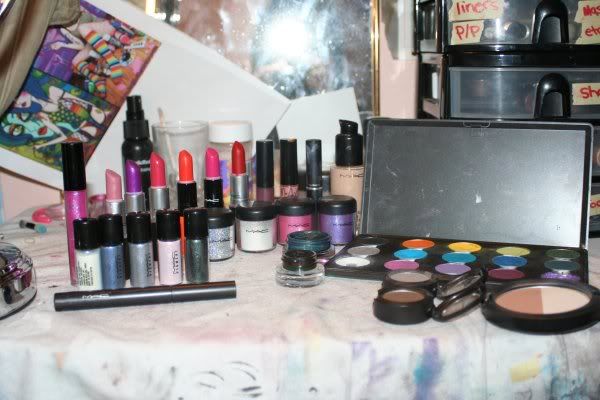
It isn't much, but here is my makeup collection.
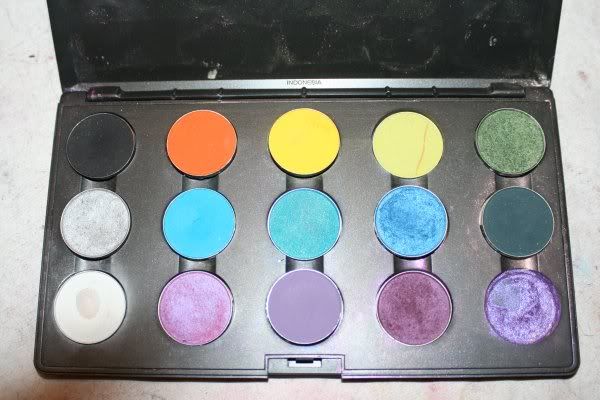
 Eyeshadow Palette
(Top left to bottom right)
Carbon, Orange, Chrome Yellow, Bitter, Humid, Electra, Clarity, Cool Heat, Freshwater, Plumage, Chil, Stars 'n Rockets, Purple Haze, Nocturnelle, Pressed violet pigment that has been replaced with Hepcat
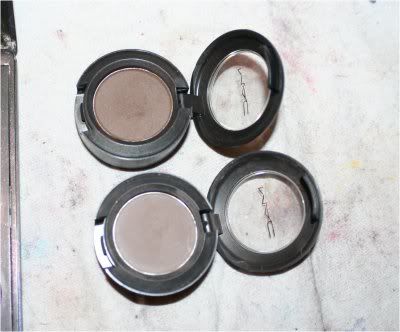
 Yet to be Depotted Eyeshadows
Brun (top)
Copperplate (bottom)

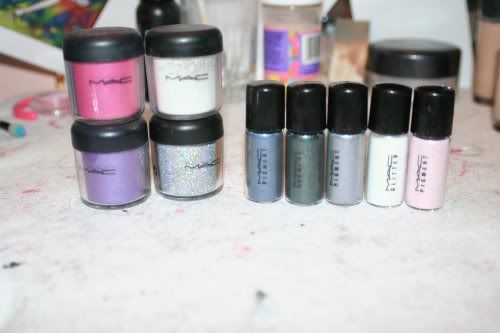
Pigments
Fushia
Vanilla
Violet
3D Silver
Naval Blue
Emerald
Softwash Grey
Reflects Blue
Helium

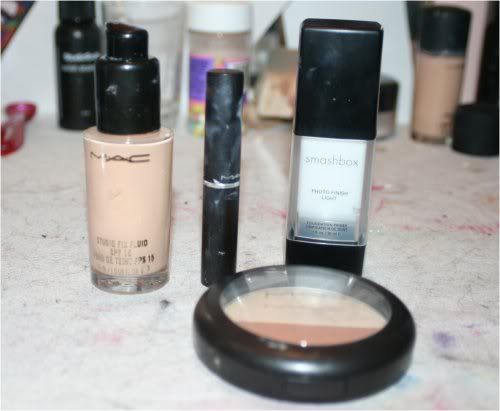
Face Stuff
MAC Studio Fix Fluid NW15
MAC Concealer NW20 (Needs to be exchanged, heh)
Smashbox Photo Finish Primer Light
Sculpt and Shape Powder
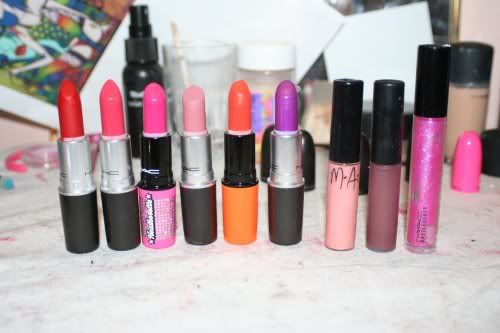
 Lip Stuff
Ruby Woo
Lustering
Hollywood Nights
Pink Plaid
Electro
Violetta
Sugar Trance
Pop Mode
Ms Fizz

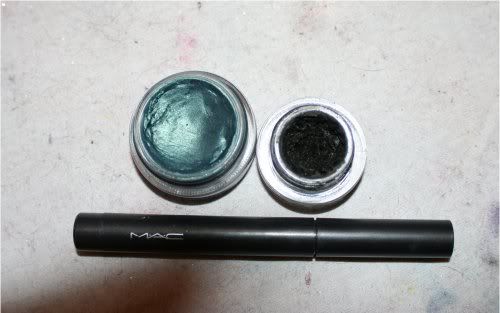
Misc.
Delf Paint Pot
Blacktrack Fluidline
Sharkskin Shadestick
 Complete Collection
 Latest Additions
Hue Lipstick
Fresh Green Mix Eyeshadow Duo
Soft Brown
Phloof!
Hepcat
Artifact Paint Pot
I have a lot of other misc. drugstore brands, UD eyeliners, etc. But didn't feel like loading them... ;)
 Eyeshadow Palette
 (Top left to bottom right)
Carbon, Orange, Chrome Yellow, Bitter, Humid, Electra, Clarity, Cool Heat, Freshwater, Plumage, Chil, Stars 'n Rockets, Purple Haze, Nocturnelle, Pressed violet pigment that has been replaced with Hepcat
 Yet to be Depotted Eyeshadows
Brun (top)
Copperplate (bottom)
Pigments
Fushia
Vanilla
Violet
3D Silver
Naval Blue
Emerald
Softwash Grey
Reflects Blue
Helium
Face Stuff
MAC Studio Fix Fluid NW15
MAC Concealer NW20 (Needs to be exchanged, heh)
Smashbox Photo Finish Primer Light
Sculpt and Shape Powder
 Lip Stuff
Ruby Woo
Lustering
Hollywood Nights
Pink Plaid
Electro
Violetta
Sugar Trance
Pop Mode
Ms Fizz
Misc.
Delf Paint Pot
Blacktrack Fluidline
Sharkskin Shadestick
 Complete Collection
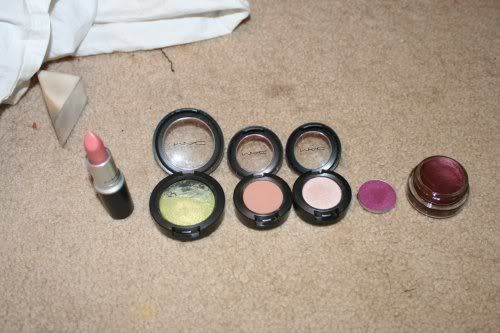 Latest Additions
Hue Lipstick
Fresh Green Mix Eyeshadow Duo
Soft Brown
Phloof!
Hepcat
Artifact Paint Pot
I have a lot of other misc. drugstore brands, UD eyeliners, etc. But didn't feel like loading them... ;)
Benefit Cosmetic's D'Finer D'Liner Review
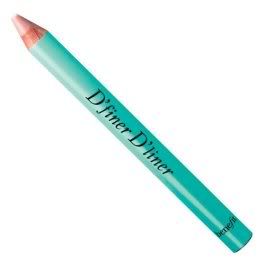
I've never been a fan of the dark-ring-around-the-lips look that comes with colored lip liner, it just doesn't appeal to me. However, I went in search of a way to keep my lipstick from feathering, and this is what I found. Clear lipliner. Why didn't someone think of this sooner?
I swatched the sample on the back of my hand at Sephora the other day to see if it really did show up clear since the pencil is more of a beige color, but I suppose that makes sense since, y'know, skin is also usually a beige color. No color showed up on my hand at all, and the texture seemed nice and not too sticky. So I borrowed a dollar from Gabriela so I could pay the full $18.00 and bought it.
Unfortunatly I had Hue lipstick on when I got home yesterday, which is a very very pale nude color
 . Testing this out with that on wouldn't prove much since nudes hardly feather at all. Since reds are notorious for bleeding all over the place, I decided today I'd do a pin-up look to test out this baby.
So far I'm very pleased with it, it sort of prevented me from "coloring outside the lines" as it were while applying the lipstick, and has at the very least made me feel more secure about it staying put.
As far as applying it goes, it felt similar to when I swatched it. Waxy but not sticky... completely clear. It made it a little difficult to figure out where you were putting it obviously, but in the end that doesn't really matter. I assume most of you can figure out where the outside boarder of your lips are, haha.
I'm going to sit here for a couple hours and take picture again to see how well it holds up.
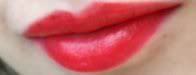 Here is the "Couple minutes after applying" picture. As you can see, it's almost a perfect, crisp red lip. The cupid's bow got smudged a little bit in the process of taking the pictures, but I think that was my fault.
Stay tuned for the "couple hours later" photo!
 This was taken about two hours after application and right after eating/drinking and all sorts of various forms of lipstick torture. Obviously the inner portion has faded away which is to be expected with a lipstick that isn't a long lasting formula. For the most part however the outter edges seem to have remained at least semi-crisp and in their original area. The corners almost completely faded away, however. Which again, is largly due to eating.
Overall, I think this is a pretty good product. On a scale of 1-10 I'll give it an 8. The clearness makes it versatile and saves money on colored liners for those who don't enjoy defined liner. The eating factor could easily be prevented with a layer of She-Laq or with a lipstick that was meant to withstand food. Worth $18.00? Not quite, but the only other clear lip liner I've heard of is by Revlon and I haven't seen the best reviews for it. I'd say pricing it at $10-15 would be more reasonable. But what can you do? It should last a while at the very least.
Also, in case you're curious as to what I used for the pin up look...

(Everything is MAC unless stated otherwise)
Face:
Smashbox Photo Finish Primer
Studio Fix Fluid NW15
Sculpt and Shape Powder
NYC Blush in Riverside Rose
Vanilla Pigment
Eyes:
Urban Decay Eyeshadow Primer Potion
Vanilla Pigment as highlight
Phloof! on inner corners
Soft Brown on lid
Copperplate on outter lid
Brun in crease
Blacktrack
Covergirl Lash Blast Mascara
Lips:
Chapstick
Benefit D'Finer D'Liner
Ruby Woo
Wednesday, July 16, 2008
MAC Mineralize Eyeshadow Duo Review
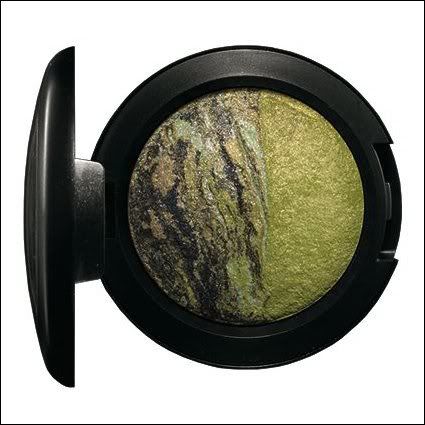
After hearing a lot of raves about the eyeshadow duos that were launched last Thursday I believe, I decided to buy one of them just to try it out.
I ordered Fresh Green Mix and it came in the mail today. I'm far too lazy to take a picture so I'll post a generic one courtesy of Temptalia.com. The one that I received has very different veining on the "swirly" side because every single eyeshadow is hand baked and completely unique. This makes the application very interesting because there are so many variations of colors that you can end up with. For the most part though, swiping your brush across the entire veined side will generally give you
 the same color, so don't worry!
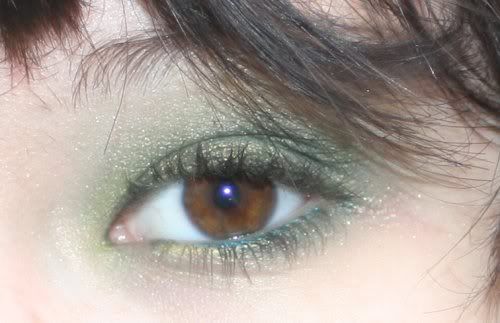
Lucky me that I got the package just as I was about to get ready to go to the mall with Gabriela, so I was able to use it in my look for the day. It's not a very good picture, but you can get the gist of it. I've seen people do other fantastic things, but this was my super quick spin on it. I used the duo plus humid to accentuate the crease a tad more.
I tried to use a flat firm brush at first because the texture was nothing like what I was expecting it to be. Big mistake because it was so powdery I ended up sending an entire chunk of it flying all over the place. If you've ever used pressed pigment, the texture is similar to that. Very smooth but also very powdery. I picked up my fluffier brush and had no problem with the application, and got no more fallout than I usually do upon eye application. I used Delft paint pot as a base, but even when I swatched it on my bare hand the color was rich and intense. They also blended together beautifully.
As far as the price goes, 17.50 does seem a little steep but if you consider that you're getting two colors and a large quantity of it at that it's well worth it. With my pathetic part-time job at GameStop making minimum wage it obviously is difficult for me to purchase very many of them at once, but I'm planning on buying Odd Couple and Sea/Sky once I get my next paycheck! For those of you who can afford them, I suggest scooping up a couple because these things are fantastic.
Here is a better picture of my overall look done with the duo, I paired it with the Hue lipstick I got from Back to MAC after I got home from the mall.

**Edit**
Decided to add what I used for the look:
Eyes:
-UDPP
-Delft paint pot
-Fresh Green Mix (both sides)
-Humid e/s
-Vanilla pigment
-Electric UD 24/7 eyeliner
-Covergirl Lashblast Mascara
Lips:
-Chapstick
-Hue Lipstick
-Sugar Trance l/g
Hello!
Well, I finally decided to start up a blog on all of my beauty expertise. I've been helping a lot of people on Myspace lately... answering their questions and giving them advice and whatnot. I thought it would be nice to have a blog outside of my Myspace one where I could just ramble on about whatever I want makeup related. (Since my friends seem to be getting sick of it, lol)
Anyway, I obviously don't have any readers at the moment. Hopefully soon!
I'm Lexi and I'm here for your beautification needs. :)
Anyway, I obviously don't have any readers at the moment. Hopefully soon!
I'm Lexi and I'm here for your beautification needs. :)
Subscribe to:
Comments (Atom)